Showing posts with label Nexus. Show all posts

Clean Rom Best Custom Rom For Nexus 7 2013 (Till Now)


nexus-7-2013
And today we will share the best custom Rom for Nexus 7 2013 available till now
Please remember before you flash this Rom your device must be Rooted & Custom Recovery Installed

Clean Rom is The Best Custom Rom For Nexus 7 2013 Till 18 August 2013:

Clean Rom is one of the most popular custom roms available for Android Devices. Clean Rom is developed by Scrosler.He is a recognized developer from XDA. Clean Rom provide superb performance & stability in your Nexus 7 2013.Clean Rom is De-Odexed and based latest Android 4.3 Jellybean version.Clean Rom is targeted for the user that want stock rom experience with the ability to choose the features & functions he want.

Features Of Clean Rom:

  • Aroma Installer:
    • Launchers: Stock Launcher, Nova Launcher, Apex Launcher
    • Browsers: AOSP or Chrome
    • Google Apps: Play Store, Chrome, Gmail, Search / Now, YouTube, Talk, Music, Maps, Street View for Maps, PlusOne, Movies and TV, Keep, All Keyboards other than English
    • Misc Apps: ES File Explorer, Thinkfree Viewer, AdFree, DropBox, Android Terminal Emulator
    • Boot Animations: S4 Google Edition, Stock
  • De-Odexed
  • init.d Support
  • ADB as Root
  • Superfast Performance
  • Superb Stability

Installation In Nexus 7 2013:

  1. You need a Rooted & Custom Recovery Installed Device for this method. Click Here If you don't have
  2. Download & Copy the Rom Zip file in Storage of your device (Link Given Below).
  3. Reboot your device in recovery mode.
  4. Wipe Data/Factory Reset
  5. Choose & Install zip file
  6. Select what you want in your device with Aroma Installer.
  7. Reboot your device
  8. Enjoy the Clean Rom!!!
Download Clean Rom Here

How To Unlock Bootloader Of All Google Nexus Devices


google-nexus-logo_thumb


1. Before You Begin:By themobilehub

  1. This method works on All Nexus Devices (Nexus One,Nexus S,Google Nexus,Nexus 4,Nexus 7,Nexus 10,Nexus 2013)
  2. You need Windows Based PC for this method.
  3. Download Nexus USB Drivers & Install them (Connect your device to PC with USB Cable for Complete of installation).
  4. Enable USB Debugging of your device.Follow This method if you don't know how to enable.
  5. Your Device must be charged 50% minimum.
  6. Make a backup of your device's data.

2. Download Required Files:

  1. Fastboot+ADB(20926)

3. Unlocking Bootloader of Nexus Devices:

  1. Turn Off your device and then Boot it into Bootloader Mode:
  2. For Nexus 4 & Nexus 7 (Press & Hold Volume Down + Power Buttons) For Other Nexus Devices (Press & Hold Volume Up+Volume Down+Power Button)
  3. Download & Extract Fastboot zip file in Local C drive of you PC.
  4. From the Extracted Folder Goto to Win32 Copy all the files and paste them at C:\\fastboot folder (C:\\ is Local Disk C)
  5. Now connect you device with PC in Bootloader Mode.
  6. Open the folder fastboot from C drive and Press & hold Shift button and press Right Click of mouse and select Open Command Window Here.
  7. Now Type in cmd fastboot oem unlock.
  8. You shall see a Unlock Page on your device screen.
  9. Use Volume Up/Down and Power Button for Confirm unlocking.
  10. Your device should reboot now.
Congratsss... Your Device Is Now With Unlocked Bootloader

How To Unlock Bootloader Of All Google Nexus Devices


google-nexus-logo_thumb

1. Before You Begin:By themobilehub

  1. This method works on All Nexus Devices (Nexus One,Nexus S,Google Nexus,Nexus 4,Nexus 7,Nexus 10,Nexus 2013)
  2. You need Windows Based PC for this method.
  3. Download Nexus USB Drivers & Install them (Connect your device to PC with USB Cable for Complete of installation).
  4. Enable USB Debugging of your device.Follow This method if you don't know how to enable.
  5. Your Device must be charged 50% minimum.
  6. Make a backup of your device's data.

2. Download Required Files:

  1. Fastboot+ADB(20926)

3. Unlocking Bootloader of Nexus Devices:

  1. Turn Off your device and then Boot it into Bootloader Mode:
  2. For Nexus 4 & Nexus 7 (Press & Hold Volume Down + Power Buttons) For Other Nexus Devices (Press & Hold Volume Up+Volume Down+Power Button)
  3. Download & Extract Fastboot zip file in Local C drive of you PC.
  4. From the Extracted Folder Goto to Win32 Copy all the files and paste them at C:\\fastboot folder (C:\\ is Local Disk C)
  5. Now connect you device with PC in Bootloader Mode.
  6. Open the folder fastboot from C drive and Press & hold Shift button and press Right Click of mouse and select Open Command Window Here.
  7. Now Type in cmd fastboot oem unlock.
  8. You shall see a Unlock Page on your device screen.
  9. Use Volume Up/Down and Power Button for Confirm unlocking.
  10. Your device should reboot now.
Congratsss... Your Device Is Now With Unlocked Bootloader

How To Update Android 4.3 on Google Nexus 7


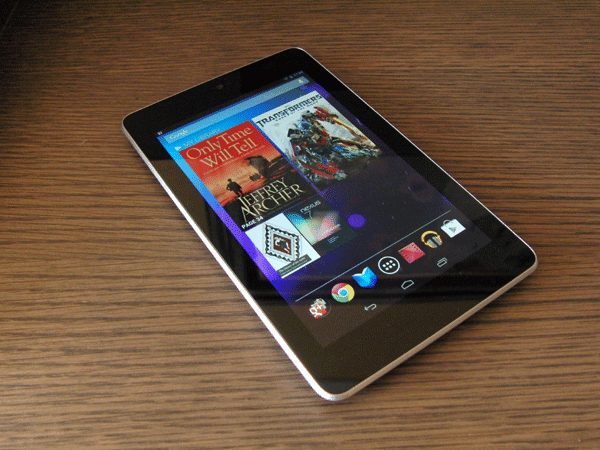
Nexus 7 is built by ASUS and comes with a NVIDIA® Tegra® 3 quad-core processor so everything is faster - pages load quickly, gameplay is smooth and responsive, and running multiple apps is a breeze. Patented 4-PLUS-1™ design gives you processing power when you need it, and battery saving efficiency when you don't. Nexus 7 was designed with gaming in mind. With heart pounding quad-core performance, a vibrant 1280-by-800 high-resolution display, and sensors like a gyroscope and accelerometer - do a barrel roll then tilt, touch and tap your way to the top of the leaderboards while exploring over 700,000 apps and games on Google Play. This multi award-winning game has been heavily optimized to utilize the eight core rendering power of Tegra's GeForce GPU, so it looks and plays great on Nexus 7. With over 8 hours of HD video playback, 10 hours of web browsing or e-reading, and up to 300 hours of standby time, Nexus 7 can go the distance.
google-nexus-7-xl2
And now Google Nexus 7 also get Android 4.3 jellybean update.
Follow the guide for updating your Nexus 7 to Android 4.3:BY themobilehub.Com
1. Before You Begin:
  1. This method is only for Nexus 7 with Android 4.2.2 jellybean (Please don't try to any other device or android version).
  2. You need a Windows based PC or Laptop.
  3. Enable USB Debugging of your device.How to Enable??? Click Here
  4. Download & Install Nexus 7 USB Drivers in your PC .After installing connect your device to PC with USB for complete the installation.
  5. Your device must be charged 50% minimum for this method.
  6. Create a Backup of your device data for safety.
2. Download Required files:
  1. Android 4.3 for Nexus 7 (ab67ca07c4b2e03eca795ada10ff041b77fbb7bf.signed-nakasi-JWR66V-from-JDQ39.ab67ca07.zip)
3. Updating of Google Nexus 7:
  1. Download the Official Android 4.3 update file from above & Renamed it to update.zip
  2. Now connect you device to PC via USB Cable and select Data Transfer Mode in your Nexus 7.
  3. Now Copy & Paste the update.zip file in the root of your SD card.
  4. Now Disconnect your device and power off your device.
  5. Now Boot your device in Bootloader Mode (By Pressing & hold Volume Up+Volume Down+Power Key).
  6. Press Volume Up button several times untill  Recovery appears on you device screen,Now press Power Button.
  7. When Exclamation mark appear in your device screen,Hold Volume Up and Power Button together for Recovery Mode.
  8. Now you are in Recovery Mode,Select update from sdcard and browse and select the update.zip file.
  9. Wait until installation complete,the installation process can take few minutes to complete.
  10. After the Installation complete,Reboot your device.
  11. Please note that first boot of your device can take 5 minute (Because it will install Apps & Services in first boot).
Congrats!!! Your are successful in updating your device
If you find and problem.....Contact Us by comment below

Download New Android 4.3 camera and gallery app emerges


It was rumoured that Android 4.3 will be launched with the stock HTC One version, but there was no trace of the new version of Android when the device was launched recently. Recently the camera interface for the Android 4.3 was leaked by someone having 4.3 running on a Nexus 4 at a Thai expo. The new UI was supposed to come with Android 4.3, instead Google has decided to put some new features of Android 4.3 on these phones instead of the complete new update. Now, we have the apk and you can install it in any device just like you install any application.By themobilehub
Screenshot_2013-06-27-16-39-12       Screenshot_2013-06-27-16-39-24
This interface was captured in video which can be seen below. The following video is from Thai expo.

The difference is not much, but the settings and options are easier to access with gestures and placement of your fingers. Also once you grab a picture, small preview icon appears on the right and disappears slowly. The earlier camera interface had a circular options to access settings and changes to the pictures to be taken. The gallery app has not changed, but the sliding has become much more smoother in filmstrip view. Photosphere has also been improved and many of the bugs have been eradicated. Now, if you have a phone with Android 4.0 or above you should go ahead and check the app out yourself by downloading the apk from the link below.
Download the apk from here.

How to Install TWRP Recovery on the Nexus S


TWRP Recovery for the Nexus S
Want to install TWRP Recovery on your Nexus S? Want to experience how it feels like using a fully-featured touch recovery? No problem, here’s how you can get it up on your device. Getting the TWRP Recovery installed on the Nexus S is quite a simple process and this guide makes it extremely easy for you to follow. Once you’re done with the procedure below, you’ll have TWRP Recovery installed on your device. So, let’s get started:

I. Before You Begin:

1. You must have done our How to Root the Nexus S procedure.
2. Your device should have at least 60% of battery life left.
3. You should have unlocked bootloader of your device. You can unlock your bootloader by following this guide.

II. Downloading Required Files:

1. TWRP Recovery Image (Download the latest version having .img as extension)

III. Installing TWRP Recovery on the Nexus S:

1. Download and place both the files onto your Desktop.
2. Extract files from the Fastboot archive to your Desktop.
3. Turn OFF your device.
4. Reboot your device into Fastboot mode. To do so, just press and hold the Volume UP+Power buttons together.
5. Select the Fastboot option available on your screen.
6. Connect your device to your PC using the USB cable.
7. Open a Command Prompt Window on your Desktop. To do that, simply hold down the Shift button on your keyboard and right-click on any empty area on the screen, then select Open command window here.
8. Type in following command into the Command Prompt Window. Make sure to replace recoveryfilename.img with the actual name of the Recovery Image you downloaded.
fastboot flash recovery recoveryfilename.img
9. Once the recovery’s been installed on your device, reboot your device.
10. You’re done!
Great! TWRP Recovery’s been successfully installed on your Nexus S and you can now start customizing your device with custom ROMs and Mods!

How to Install TWRP Recovery on the Nexus S 4G


TWRP Recovery for the Nexus S 4G
Nexus S 4G has gotten loads of custom development for it, which include custom ROMs, Mods, Tweaks and so on. And here comes the latest addition to the development, the TWRP Recovery. You may have heard about this fully-touch based recovery, that works the similar way as CWM Recovery but offers a completely different interface. In this guide, you’ll learn how you can install TWRP Recovery on your Nexus S 4G smartphone and enjoy flashing ROMs!

I. Before You Begin:

1. You must have done our How to Root the Nexus S 4G or This procedure.
2. This will replace your current recovery with the TWRP Recovery.

II. Downloading Required Files:

1. GooManager — QR Code (Google Play Link)

III. Installing TWRP Recovery on the Nexus S 4G:

1. Start off with downloading the GooManager app on your device and then install it.
2. Once the app’s been installed, launch it from your App Drawer.
3. Press the Menu key on your device and you’ll see a menu on your screen. Tap on Install OpenRecoveryScript option.
4. Hit Yes to confirm your action.
5. You’ll now see the model number of your device on your screen. If it’s okay, hit Yes.
6. Have a cup of coffee as the app will now automatically download and install the recovery on your device.
7. You’re all set!
Congrats! Your device’s been successfully equipped with TWRP Recovery and you now have open doors for the custom firmwares!

How to Install TWRP Recovery on the Nexus 4


TWRP Recovery for the Nexus 4
When it comes to custom development, Nexus devices have always been a step ahead than the competitors and why not, they’re the pure Android handsets from Google. Nexus 4 has recently got the TWRP Recovery, a custom recovery that helps in installing custom ROMs and flashing mods. You may have used the CWM Recovery in past, but this recovery’s a bit different in terms of user-interface. The developers have tried to keep the interface as user-friendly as possible while not compromising on features. If this sounds good to you and you’re interested in giving it a shot, then just jump onto the guide below to learn how you can install TWRP Recovery on your Nexus 4 device.

I. Before You Begin:

1. You must have done our How to Root the Nexus 4 procedure.
2. This will replace your current recovery with the TWRP Recovery.

II. Downloading Required Files:

1. GooManager — QR Code (Google Play Link)

III. Installing TWRP Recovery on the Nexus 4:

1. First of all, head over to Google Play and get the GooManager app installed on your device.
2. Once it’s been installed, launch it from your App Drawer.
3. Press the Menu button and you should see some options on your screen. Hit Install OpenRecoveryScriptoption.
4. On the next screen, press Yes to confirm your action.
5. You should now see the model number of your device on your screen. If it’s correct, hit Yes.
6. Now sit back and relax as the app will automatically download and install the recovery on your device.
7. Once the recovery’s been installed on your device, reboot your device.
8. You’re all set!
Cheers! Your Nexus 4 is now having the TWRP Recovery, a fully-touch based recovery you can use to flash custom ROMs and a plenty of other tasks!

How to Install TWRP Recovery on the Nexus 10


TWRP Recovery for the Nexus 10
Jelly Bean powered tablet from Google, the Nexus 10 has been able to get loads of custom developments for it in a short period of time. First it got a root method and then eventually a custom recovery arrived for it. Here comes the latest addition to the list, the TWRP Recovery. As the name suggests, it’s a custom touch-based recovery, just like CWM, but offers a completely revamped interface with a new version. Getting it installed on the Nexus 10 takes no more than a few minutes and if you’re ready, then you can follow the guide given below and have a completely new recovery experience!

I. Before You Begin:

1. You must have rooted your device before doing this procedure. You can check out our How to Root the Nexus 10 procedure to root your device.
2. This will replace your current recovery with the TWRP Recovery.

II. Downloading Required Files:

1. GooManager — QR Code (Google Play Link)

III. Installing TWRP Recovery on the Nexus 10:

1. Download and install the GooManager app on your device using the link given above.
2. Once installed, open it from your Menu.
3. Press the Menu button on your device and select Install OpenRecoveryScript option.
4. Hit Yes to confirm your action.
5. You’ll now see the model number of your device on your screen. If you think it’s correct, hit Yes.
6. The app will now automatically install the recovery on your device.
7. You’re done!
Excellent! Your Nexus 10 has been successfully equipped with TWRP Recovery to let you flash ROMs and all sorts of flashable content on your device!

How to Unlock the Nexus 4/10 Bootloaders without Fastboot


Unlock the Nexus 4/10 Bootloaders
Unlocking bootloaders of the Nexus series devices have always been easier, you just plug-in your device and start Fastboot and issue a simple command and voila, your bootloaders unlocked. While this seems pretty easy to Windows PC users, Linux and Mac users have always been in lack of such easiness. Such users do not have to worry any longer as an XDA user has developed an app that does what it’s supposed to: unlock the bootloader. As I mention it’s an app, you just have to grab it from Google Play and launch it on the device. To help you out on how the app can be used, we’ve a nice guide just below. Follow it and get your bootloaders unlocked.

I. Before You Begin:

1. The procedure works on Nexus 4 and Nexus 10 devices only.
2. You must have rooted your device before doing this procedure. The rooting guides are available here and here, for Nexus 10 and Nexus 4, respectively.

II. Downloading Required Files:

1. BootUnlocker (Google Play Link)

III. Unlocking Nexus 4/10 Bootloaders without Fastboot:

1. Use the link provided above to install the BootUnlocker app on your device.
2. Once installed, launch it from your App Drawer.
3. You’ll find two options in the app, hit the Unlock button and it’ll unlock the bootloaders.
BootUnlocker App
Hit the Unlock button
4. Follow any instructions displayed on your screen.
5. And you’re done!
Great! The bootloaders of your device have been successfully unlocked. Should you need to relock them at a later time, just fire-up the app and hit Lock button.

How to Install ClockworkMod Touch/Non-Touch Recovery on the Nexus 10


CWM Recovery for the Google Nexus 10
Though it hasn’t been a long time since the Nexus 10 was announced, we’re seeing some of the popular custom ROMs being cooked-up for the device. No matter how perfect Google makes its stock firmwares, flashaholics are always going to need a change and that’s when they move to custom ROMs as they are developed keeping such users in mind. To flash the custom ROMs, you’re going to need a custom recovery and to add to your happiness, ClockworkMod Recovery’s available for the Nexus 10, providing a complete replacement for your stock recovery with a bunch of new options than that of your stock recovery. The following guide shows how you can install ClockworkMod Recovery on your Google Nexus 10.

I. Before You Begin:

1. You must have rooted your device before doing this procedure. Please head to our how to root the Google Nexus 10 procedure first, finish it, then return to this procedure and continue.
2. Make sure your device has at least 60% of battery life left otherwise it may cause issues.

II. Downloading Required Files:

1. ClockworkMod Recovery Image Non-Touch or Touch 

III. Installing ClockworkMod Recovery on the Google Nexus 10:

1. Place both the files you downloaded to your Desktop.
2. Extract files from the Fastboot archive to your Desktop.
3. Rename the recovery image you downloaded to recovery.img.
4. Turn OFF your Nexus 10.
5. Reboot it into Fastboot mode by pressing and holding the Volume UP+Volume DOWN+Power buttons together.
6. Once the device boots into Fastboot mode, connect it to your PC using the USB cable.
7. Launch a Command Prompt Window on your Desktop. To do so, press and hold the Shift button on your keyboard and right-click on any empty area on the screen, then choose Open command window here.
8. Type in following command into the Command Prompt Window:
fastboot flash recovery recovery.img
9. Once the recovery’s flashed on your device, enter the following command:
fastboot reboot
10. The device should reboot.
11. And you’re all set!
Wonderful! The ClockworkMod Recovery has been installed on your Nexus 10 in no more than a few minutes. Getting a custom recovery on the device means you’ve freedom to test every available custom ROM on the device provided it’s compatible with it!

How to Boot Multiple ROMs on the Nexus 7


Multiple ROMs on the Nexus 7
While it was possible for any Windows based PC to have two different OSes installed on it, the same wasn’t possible for Android Devices like the Nexus 7, until a thread over at XDA came out. According to the developer on XDA, you can now have multiple ROMs running on your Nexus 7, side-by-side. With the primary ROM being on the internal memory and the custom ROM on the secondary memory, you’ll be able to enjoy two different tastes by just booting into the ROM of your choice. To make such things easier to do, here we’ve created a guide for the folks who own a Nexus 7 and like to modify it, just like we do. Follow our guide and have fun!

I. Before You Begin:

1. You must have done our How to Root the Nexus 7 procedure first. Do it first and then continue with this.
2. You must have ClockworkMod Recovery installed on your device. If you followed our root procedure, you already have it.

II. Downloading Required Files:

1. MultiROM 

III. Installing MultiROM on the Nexus 7:

1. Download and place all the files you downloaded to your Desktop.
2. Extract files from the Fastboot archive to your Desktop, leave rest of the archives unextracted.
3. Connect your Nexus 7 to your PC using the USB cable.
4. Copy the MultiROM ZIP over to the root of your SD card.
5. Once done, disconnct the device from your PC.
6. Enable the USB debugging option on your device by going to Menu>>Settings>>Developer options>>USB debugging.
7. Connect the device to your PC once again.
8. Open a Command Prompt Window on your Desktop. To do so, press and hold the Shift button on your keyboard and right-click on any empty area on the screen, then select Open command window here.
9. Type in following command into the Command Prompt Window:
adb reboot recovery
10. The device should reboot into the ClockworkMod Recovery.
11. From the Recovery Menu, choose install zip from sdcard followed by choose zip from sdcard.
12. Select the MultiROM ZIP you copied earlier for flashing. Wait till it finishes flashing the file.
13. After it’s done, choose reboot system now from the Recovery menu.
14. Once your device boots up into normal mode, issue following command using the Command Prompt Window:
adb reboot bootloader
15. The device should reboot in bootloader mode. Select the Fastboot option that appears on the screen.
16. Now, type in following command into the Command Prompt Window:
fastboot flash recovery recovery.img
17. It should flash the modified recovery on your device.
18. Once it’s done, issue following command:
fastboot reboot
19. The device should reboot in normal mode.
Great! The MultiROM feature has successfully been installed on your Nexus 7, let’s learn how you can load a ROM using it.

IV. Adding a ROM on the Nexus 7 with MultiROM:

1. Download any custom ROM of your choice from our Nexus 7 ROMs Here Source Unlockr
2. Place the ROM ZIP file on the Desktop of your PC. Do NOT extract the archive.
3. Connect your Nexus 7 to your PC using the USB cable.
4. Copy the ROM ZIP over to the root of your SD card.
5. Disconnect the device from your PC after the file’s been copied.
6. Turn OFF the device.
7. Reboot it into the Recovery mode. To do so, press and hold the Volume UP+Volume DOWN+Power buttons together.
8. Select Recovery option from the list.
9. Once inside the recovery, go to Advanced>>MultiROM>>Add ROM.
10. Select the ROM ZIP file you copied earlier to your device.
11. Follow any instructions you see on the screen.
12. Reboot the device.
13. You’re all set!
Awesome! You have successfully added a ROM on your Nexus 7 that has been put along with the original ROM you have on the device. To set which ROM to be booted by default, follow the following steps.

V. Setting up a Default ROM for the boot:

1. Turn OFF your Nexus 7.
2. Reboot it into the Recovery Mode. To do so, simply press and hold the Volume UP+Volume DOWN+Power buttons together.
3. Select Recovery option from the list.
4. In the Recovery, go to Advanced>>MultiROM>>Settings.
5. Select the ROM you want to boot-up automatically when you turn ON the device.
6. Reboot the device.
7. You’re done!
Brilliant! You’ve successfully set up a default ROM on your Nexus 7, which should boot-up automatically each time you turn ON your device.
Your Nexus 7 is now ready to accommodate more than one ROM at a time and switching fro and to a ROM is quite easy, everything’s explained above!