Releasing Two Column Blogger Template “The Cute Box” - Speedy Yet Professional!


CUTE-BOX-DISPLAY-PIC I was on EID holidays and during these three days a part from spending some time with my family and friends I spent a portion of my time in designing a really cute and speedy “two column” Blogger template. I named it “Cute Box”. It is unbelievably fast loading, well optimized, monetization friendly, has an attractive magazine style look and is surely cute!
Let’s not waste any time and have a look at it, (The Screenshot may be different from actual demo)
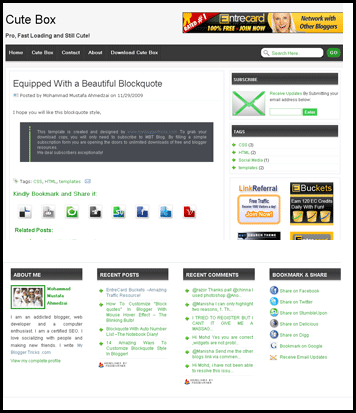
Cute-Box


Features

Lets look at some of its Main features,
  1. Spitted Header
  2. Two Column
  3. Well organized Post Heading with separate date, time and label sections
  4. Wide Post body with Stylized BlockQuote
  5. Bullet lists with Image Hover Effect
  6. Post Footer With Seductive Social Bookmarking Icons –The Flapper!
  7. Post Footer With Related Post Widget
  8. Posts summarized With Read More link
  9. Embedded and stylized Comment section. Author and Readers comment with different style
  10. Wide Open Comment Form!
  11. Comment Avatars
  12. Flexible Search Box
  13. Unique Subscription Form
  14. Best Advertisement sections
  15. Four Column Footer Widget. One Column Can accommodate as many widgets as you can add!
  16. Stylized Author Profile 
  17. Bookmarking Widget For Homepage
  18. And So on…
The bolded features are those that are found in 1/10,000 blogger templates found in the blogosphere. I am not kidding!

Customization

Below are important precautionary and customization steps for Cute Box . Click each link for details.
  1. Back Up your current Blogger template
  2. Back Up your Blogger widgets
  3. Upload Cute Box
  4. Edit The Navigation Menu
  5. Add The Subscription Email Form
  6. Author Profile
  7. Add The Bookmarking Widget

You will have to save your current blogger template for safety precaution. To do this follow the steps below,
  1. Go To Layout > Edit HTML
  2. Click the link that says “Download Full Template“. As shown in the image below,
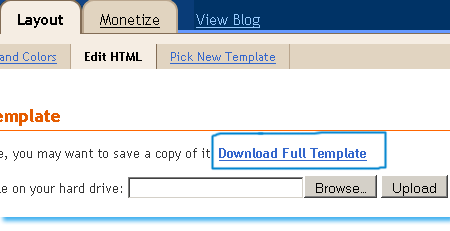
backup-template1
    3.    When asked where to save the template, choose a safe location in your hard drive.
    4.    Done!
To save your current widgets follow the steps below,
  1. Go To Layout
  2. Open each widget one by one and copy the code inside it along with the title and paste it in a notepad (not a WordPad)
  3. Save the notepad in a safe location
  4. Done!
Once you have downloaded Cute Box then follow the steps below to replace your current template with it,
  1. Go To Layout > Edit HTML
  2. You will see a box with two buttons at its side that says “ Browse” and “Upload” as shown below,
backup-template
    3.    Click the browse button, locate the “Cute Box” file and then click the upload button
    4.    Now you will be asked that certain widget data will be lost if you click save. Since we have already backed up all our widgets so we don’t care. Go on and click the “Confirm Save” button. View your blog to see the good change!
navigation-menu
To edit the navigation menu, follow the steps below,
  1. Go to Layout > Edit HTML
  2. Search for <div id='navleft'> using the browser search box     (Tip:- Press Ctrl + F )
  3. Just below <div id='navleft'> you will see a long chain of code as shown below,
<div id='navleft'>
      <ul>
<li><a expr:href='data:blog.homepageUrl'>Home</a></li>
<li><a href='#'>Cute Box</a>
<ul>
<li><a href='#'>Sub Page 1</a></li>
<li><a href='#'>Sub Page 2</a></li>
<li><a href='#'>Sub Page 3</a></li>
</ul>
</li>
<li><a href='#'>Contact</a>
<ul>
<li><a href='#'>Sub Page 1</a></li>
<li><a href='#'>Sub Page 2</a></li>
<li><a href='#'>Sub Page 3</a></li>
<li><a href='#'>Sub Page 4</a></li>
</ul>

</li>
<li><a href='#'>About</a></li>
<li><a href='http://www.themobilehub.blogspot.com'>Download Cute Box</a></li>
</ul>
</div>
Replace The Hash signs (#) with your page links and bolded green text with your Page titles. If you don’t want the drop down menu then simple delete the red portion. Replace http://www.themobilehub.blogspot.com with your own page link.
If you want to add another link then simple paste this code just above </ul>
<li><a href='#'>Your Page Title</a></li>

Add The Subscription Email Form
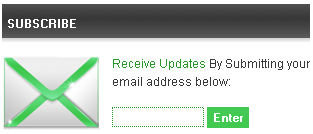
subscription-form
To add the subscription email form do the following,
  • Go To Blogger > layout
  • Click the edit link next to Subscribe
  • Paste the code below inside it,
<style>
.emailform {
padding:0px; margin: 0px 10px 0px 0; float: left; width:100px; height:77px; border:0;
}
input.mbt1 {
color:#fff;
font: bold 10px "ms sans serif",Arial, sans-serif;
background:#41C952;
border:0;
padding:3px;
}
input.mbt1hov {
background:#F39100;
}
</style>
<a href="http://feeds.feedburner.com/TheMobileHubs" rel="alternate" title="Subscribe using a Feed Reader" type="application/rss+xml"><img src="https://blogger.googleusercontent.com/img/b/R29vZ2xl/AVvXsEiqVgLpJqxvBadbx5YnQ7WQiKVwSkHL3bVgTym5nQ09pYNf27iiTue1zYM9sTZVWCTgsw6BqAyPMVq8KS1hUFXN_KgwwAre4SoeLv6rqPUP29gkHs0ayA9KrcxIRA0UD5VPA1P9Jz2-7W03/s400/Email+Orange_128.png" class="emailform"/></a><p><a href="http://feeds2.feedburner.com/TntByStc" rel="alternate" title="Subscribe to my feed" type="application/rss+xml">Receive Updates </a><span style="color: #383838;">By Submitting your email address below:</span></p>
<form action="http://feedburner.google.com/fb/a/mailverify" style="padding: 5px; " target="popupwindow" method="post" onsubmit="window.open('http://feedburner.google.com/fb/a/mailverify?uri=TntByStc', 'popupwindow', 'scrollbars=yes,width=550,height=520');return true"><input style=" color:#289728; background: #fff; border:1px dotted #289728; width: 90px;" name="email" type="text"/><input value="TntByStc" name="uri" type="hidden"/><input value="en_US" name="loc" type="hidden"/> <input onmouseover="this.className='mbt1 mbt1hov'" onmouseout="this.className='mbt1'" value="Enter" class="mbt1" type="submit"/></form>
  • Replace the above links with your feed links. Read this post for detail -> Beautiful subscription form for blogger
  • Hit Save
  • Done!
Add Author Profile

To write a new bio for your self or to delete this widget, do the following,
  • Go To  layout
  • Click the edit link next to About Me
  • And make the necessary changes that you like to make
Add The Bookmarking Widget
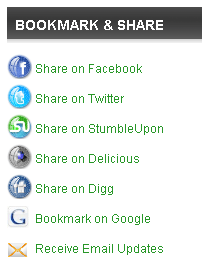
bookmarking-widget
I will write a comprehensive post on how to add this very important widget.

Some Useful –Amazing Resource!


  1. Spice S9090 Review
  2. Nokia Lumia 710 price in India,Nokia Lumia 710
  3. Nokia Asha 300 mobile phone price in India,Nokia a
  4. How to change your facebook theme
  5. How to lock any file or folder without any software
  6. Spice Mi-350 Review
  7. Cool keyboad trick
  8. How to Create a Harmless Funny Virus
  9. Top 10 google I'm feeling lucky tricks
  10. How to check your internet speed
  11. How to increase your youtube, metacafe buffering
  12. How to Send unlimited Free international sms without
  13. Samsung Galaxy Y S5360 price India |Samsung Galaxy
  14. How to add Facebook or twitter profile to google p
  15. How to connect your website or blog to google plus
  16. Google Plus Short-cut Keys List for G+ Users
  17. Google Chrome Short-cut Keys
  18. How to recharge your mobile for free with embeepay
  19. Google plus features.
  20. Internet errors or what is 404 error.
  21. Happy B’day Android Phone!
  22. How to make your PC speak what you type.
  23. How to avoid unnecessary emails from Facebook
  24. What is favicon and how to change it.
  25. Decorate your Facebook status with cool alphabet
  26. Auto Save Passwords Without Notification in Firefox
  27. Download Windows 8 transformation Pack
  28. Schedule Auto SMS in android to send at later time.
  29. Accessing windows phone 7 (WP7) contacts through
  30. Google +(plus) review
  31. How to get google plus invitation OR what is goo
  32. Put your name after Time in Taskbar
  33. How to Use Bold/underline text in facebook chat
  34. How to increase your RAM and make your computer
  35. Cool Tricks with google OR google gravity fun.
  36. Format your pendrive by autorun.inf
  37. Facebook's Recent Updates Trying to fight off with
  38. 10 Coolest Firefox Tricks!
  39. how to add chat feature to a blog
  40. SECRET CODES FOR NOKIA.
  41. Nokia N9 price in India |Nokia N9 meeGO full Specification.
  42. How to create a banner for your blog
  43. Nokia 500 unboxing
  44. Change Your IP In Less Than 1 Minute
  45. Speed up booting time
  46. HOW TO DELETE ADMIN PASSWORD WITHOUT ANY SOFTWARE
  47. Latest Facebook chat emotions. or How to use Like
  48. how to create a Bootable pendrive
  49. Microsoft word Shorcut keys
  50. How to speed up mozilla firefox or Speed up Mozilla
  51. Hack User Account Control in Vista
  52. Common Errors in PC & There Solution
  53. 100 Windows XP RUN COMMANDS
  54. how to Repair windows xp
  55. 10 most useful premium account access for free ..
  56. How to detect undetective pen-drive or how to detect.
  57. Hear voice of your PC
  58. Mozilla Firefox shortcut keys
  59. Gmail shortcuts
  60. Akash tablet review or The cheapest tablet ever
  61. HIdden music in windows xp.
  62. Admin password hack
  63. PC Facts
  64. Steve Jobs, 1955-2011
  65. Boot faster by removing unnecessary startup progra
  66. Samsung Galaxy Tab 750 Price in India |Samsung Gal

How To Customize “Block quotes” In Blogger With Mouse Hover Effect – The Blinking Bulb!


blinking bulb This tutorial will really enable you to create stunning and attractive blockquote for your blogger posts or websites. This blockquote will change color when mouse cursor is hovered over it. 


Hover your mouse cursor on the blockquote below.

 
Interesting, isn’t it? Now let’s learn how to add similar effects like the blinking bulb effect above.

Add The Blinking Bulb Blockquote To Blogger

This blockquote can be added in the similar way as explained in my earliar posts. If you are new then read this part of my previous post –> Add and Customize Blockquote In Blogger
The CSS code to be inserted just above ]]></b:skin> is this,
blockquote {
background: #000 url(https://blogger.googleusercontent.com/img/b/R29vZ2xl/AVvXsEgcC5Wa4dPMlEvBTNPwy4gI4oKW2R74lYp4X9ANpe_dKdwmjlItp0BY5-Yun-_I_crMfEwzgmxvg0Bqw55jmG3L_ZPnnsVm8HV81AQA0Zpgi3yrgNixvCAQ1aE8bavBasYSQyeLifeh5x4/s1600/bulb-off.gif) no-repeat right bottom ;
margin: 0 20px;
padding: 20px 70px 20px 20px;
color:#595959;
font: bold 0.9em "comic sans ms", "Times New Roman", Times, serif;
border:1px solid #DDD;
}
blockquote:hover {
background: #000 url(https://blogger.googleusercontent.com/img/b/R29vZ2xl/AVvXsEinQEKuNFUYTNjPgUPdXazlx6nF6nA3JQwG78jKExq4txn0vECbK_YW0eYzT7lItqSCcjVtd57y-rn15CoaKCMvm8IQZCQHUgEuXMzD244ooQGSbEPYaHDDdzDT51LIUsnr3KiGUCmT8JI/s1600/bulb-on.gif) no-repeat right bottom ;
color:#E0E089;
}

blockquote p {
margin: 0;
padding-top:10px;
}
The second image in red link appears on mouse hover and the second image in green link appears when mouse is moved away from the blockquote.

Create Custom Blockquote Of Your Choice!

You can use similar effect by changing the background images, font colors, border colors or background colors etc. The first part in the CSS code above i.e blockquote { bla bla } represents the effect on normal view and the second code i.e blockquote:hover { bla bla } is responsible for the hover effect. So you can easily customize the font and border types and colors along with background colors to create a cool mouse hover effect.
I have shared some examples below which uses no image at all,


Let me know if any thing is left unclear. For customization guide read this post –> Customize Blockquote In Blogger

Blockquote CSS Examples With Auto Number List –The Notebook Diary!


According-To-MR-MBT I shared a tutorial yesterday on 14 amazing ways to stylize Blogger Blockquote and today I have a really interesting and exceptional blockquote for those who write tutorial based articles on their blogs and websites. I have created two blockquotes, the first one has no number list while the second one comes with automatic number list and looks like your notebook diary. The number list starts at #1 and end at #112. Both of these blockquotes can easily be customized to suit your web layout.
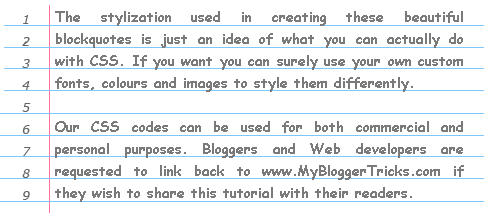
So let’s have a look at each one of them first.

Blockquote With Auto Number List:

notebook-with-numbers
Blockquote Without Number List:
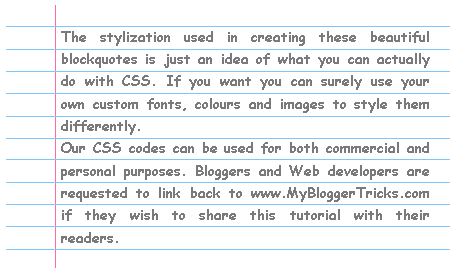
notebook-without-numbers
Liked the difference? Now let’s learn how to add each one of them to your Blogger Blogs.

Adding Blockquote With Auto Number List To Blogger

To add this blockquote to blogger, follow the simple steps below,
    1. Go to Blogger > Layout > Edit HTML
    2. Backup your template
    3. Search for .post blockquote and delete it along with all its occurrences. In most templates the codes look like this,
      .post-body blockquote { line-height:1.3em; }
      OR
      .post blockquote{ bla bla bla}
      If you couldn’t find such code then it is OK.
    4. Now search for ]]></b:skin> and just above ]]></b:skin> , paste the code below,
blockquote {
background: #fff url(https://blogger.googleusercontent.com/img/b/R29vZ2xl/AVvXsEh5oG_A4LCstDc6Vqf6QIh9EoV56clwSKIE9TQ5TQDG-WUM8-4usDOPlOoHz2ZfKmYWARcXc_0Gh5lKHkws-cyFmR2o1djs8tcGa1He0zWwnaRHFs_Zy2Ax1xc4tHeOl0ruZsRe5IfjvuM/s1600/notebook-with-numbers.gif) repeat-y;
margin: 0 20px;
padding: 0px 20px 5px 55px;
color:#7a7a7a;
font: bold 0.9em  "Comic Sans MS", verdana;
line-height: 153%;
}
blockquote p {
margin: 0;
}
Customization:-
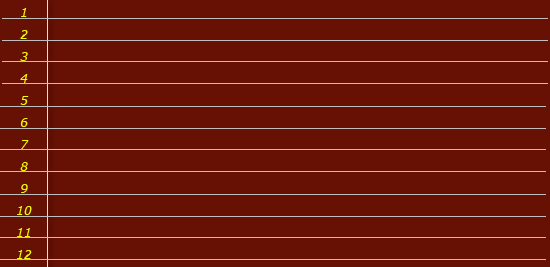
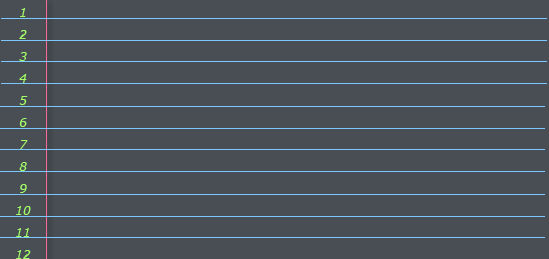
You can also change the Number list background by replacing the bolded image link in the code above with the image URLs of one of these blockquotes.
Tip:- Right Click the links below each blockquote and choose Save Link As Or Copy Link Location to its image URL.
font :- It includes font style, size and type respectively. Match the colours with the code above for reference. Font style can be bold, normal , italic or bold italic
color :- This refers to text colour. You can use a different font colour using our color chart

Adding Blockquote With No Number List To Blogger

To add this blockquote simply follow the same steps as shared for the blockquote with auto number list. But for step#4 paste the code below instead,
blockquote {
background: #fff url(https://blogger.googleusercontent.com/img/b/R29vZ2xl/AVvXsEh5ls4qg7j49aSMOfMT-vLfn7gINI8PaZhbMamanaHLhwN29jXi_0fR3x1SiWWoNlRZJLRSBIwQIR5yLFa3lhYUMsbYUmyFW9OIZXgrjYpQ76Lj0EWORfNINFS0tdssTJafY-bMgQeud5s/s400/notebook.gif) repeat-y ;
margin: 0 20px;
padding: 20px 20px 20px 55px;
color:#7A7A7A;
font: bold 0.9em  "Comic Sans MS", verdana;
line-height: 155%
}
blockquote p {
margin: 0;
}
You can replace the Background Image link with one of these.
Tip:- Right Click any of the blockquote images below and choose Save Link As Or Copy Link Location to get its image URL. notebook-withoutbrown
notebook-withoutnavy
notebook-withoutpink
That’s All!
Note:- If you want to increase the number range for the blockquote with auto number list or if you want to create an image with your custom colours than I can provide you the PDF source file for it. But it will be given to subscribers only. If you haven’t subscribed yet, kindly do so to avail unlimited download resources from us to you.

14 Amazing Examples To Customize Blockquote Style In Blogger!


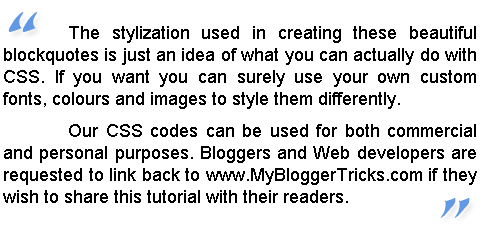
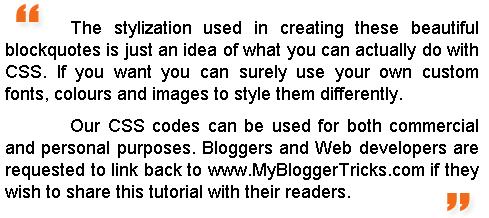
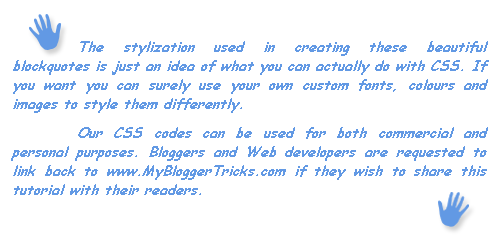
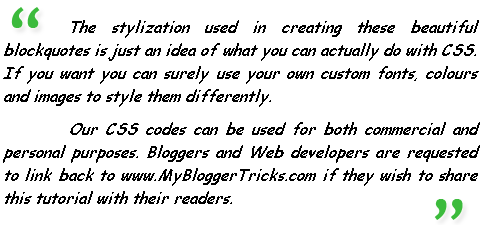
Blockquotes with different styles A block quote or block quotation is an extract in a written document, set off from the main text as a distinct. We all quote great authors but we all must present these great words in an extra ordinary way using a beautiful blockquote. We have created simple CSS codes for around 14 Blockquotes, which are outstanding in look and feel. These blockquotes will give you an idea on how to create your own customized blockquote for your blogs and web pages.
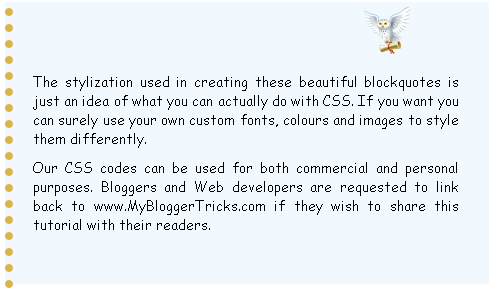
Have a Look at each one of them. Details of adding the blockquote to your blogs and websites are given in the implementation and customization section.

Blockquote With a Fancy Border and Owl Image

owl
 Blockquote Code:
blockquote {
margin : 0 20px;
padding: 60px 30px 40px 20px;
background : #F1F8FE url(https://blogger.googleusercontent.com/img/b/R29vZ2xl/AVvXsEgG5X5TODmYQqEyalrw_xyr4YPnGsI7J1OfK1lTrkS4mSlUC5dF3SJVhjrZZcbsj_1dK7LoBSdAYwkV63ztkT4TLeFEaeGBcR3ahFUyDHjKopLBalzQ8esJo8kbEiujCnUsczvZYsLbGsU/s400/owl.png) no-repeat 350px 5px;
font: normal .9em "comic sans ms", Courier,"Times New Roman", Times, serif;
color : #000;
border-left: 8px dotted #DAB547;
}
blockquote p {
margin: 0;
padding-top:10px;
}

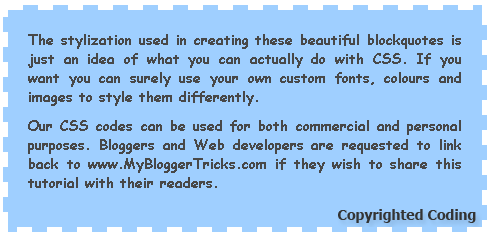
Blockquote With a Purple Corner Label and Border At Bottom

Purple-Scanned-Copy
Blockquote Code:
.post blockquote {
margin : 0 20px;
padding: 70px 20px 20px 40px;
background : #E4EAFE url(https://blogger.googleusercontent.com/img/b/R29vZ2xl/AVvXsEhCjUk7q-rw1C4Ebz3sPxihRVW4dT7Mvv_NLVOZs1BeGKgh5LRL0JVX9IJ8YScmMtHn1oRg133LY1wqYg5a67rsydaA-8JZ2y314r2rz1u1Jm_YoZUGiUS01RMH0LdYajYi9FIWRekCiOA/s400/angular-purple.gif) no-repeat top left;
font: bold 1em Helvetica, verdana, Georgia, "Times New Roman", Times, serif;
color : #000;
border-bottom : 5px solid #435388;
}
.post blockquote p {
margin: 0;
padding-top:10px;
}

Jigsaw Blockquote With An Image At Right Corner

jigsaw
 Blockquote Code:
.post blockquote {
margin : 0 20px;
padding: 10px 20px 25px 20px;
background : #9FCFFF url(https://blogger.googleusercontent.com/img/b/R29vZ2xl/AVvXsEj7SCgj_Mhe9BVpI4CBW4oJnIq62I8SJIV8784yneFzjf4uSQ156Pif1irOerxfXFirZdYexC5njXiV7rl-wlgVOlac1pszWFoGXLgN3mtqo4dJf-xyb9T_HxdJ31vGTC0a3cdf1gRpA0I/s400/block22.gif) no-repeat right bottom;
font: bold .9em "comic sans ms", arial, Helvetica,verdana, Georgia;
color : #484848;
border: 5px dashed #fff;
}
.post blockquote p {
margin: 0;
padding-top:10px;
}

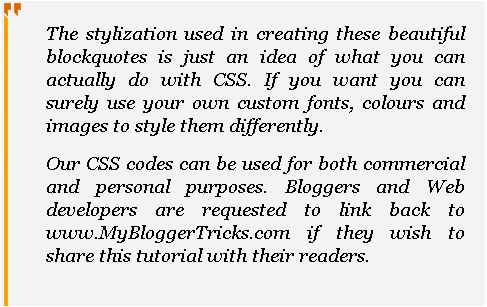
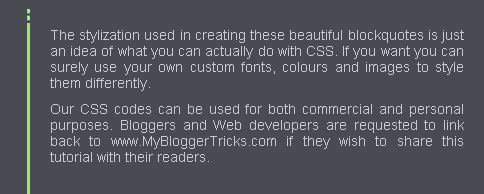
Blockquotes With Classic Left Borders

left-sided-brownish
 Blockquote Code:
.post blockquote {
background: #F3F3F1 url(https://blogger.googleusercontent.com/img/b/R29vZ2xl/AVvXsEhrCTF2Rl0JSBRsIjqsgsVMtHSwjyD_gOjQqsOTHmHNLai2acHDmf_9jTNPfaxMXv9KS1A1i6nFA2_RNGb0QeIM3zLJH3af4ybnfgxqLvkiB3gQHwcHUGbeoxt6dXEkPPHjxUQW7mUtAqs/s1600/comma-side-orange1.gif) ;
background-position:;
background-repeat:repeat-y;
margin: 0 20px;
padding: 20px 20px 10px 45px;
font-size: 0.9em;
font: italic 1.2em Georgia, "Times New Roman", Times, serif;
}
.post blockquote p {
margin: 0;
padding-top: 10px;
}

left-sided-green-black
 Blockquote Code:
blockquote {
background: #484B52 url(https://blogger.googleusercontent.com/img/b/R29vZ2xl/AVvXsEi2DE4u9UnuF4HTC-KJJQoDLGzDFf-0jdS4BEsZRGHrUORWu1a2zPOz0GCtkg9HFCMNQFylLh7QWVlQDCjeJuajKGn_cvWqwDtFErzT5bLEsR4DOvRV3ttGVzj-ZkEejltVced_6KHpvTY/s1600/green-black-side.gif) ;
background-position:;
background-repeat:repeat-y;
margin: 0 20px;
padding: 20px 20px 20px 50px;
color:#C7CACF;
font: normal 0.9em Helvetica, verdana, serif, Georgia, "Times New Roman";
}
.post blockquote p {
margin: 0;
padding-top: 10px;
}

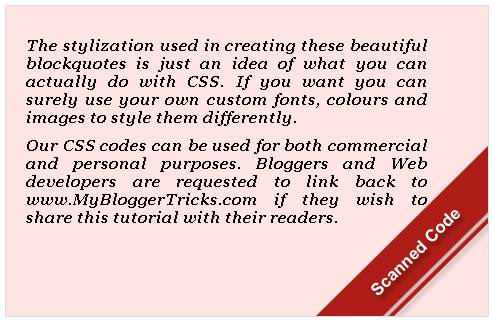
Blockquote With A Brown Corner Label

Brown-Scanned-copy
 Blockquote Code:
.post blockquote {
margin : 0 20px;
padding: 20px 60px 80px 20px;
background : #FEE4E3 url(https://blogger.googleusercontent.com/img/b/R29vZ2xl/AVvXsEi6DNB1OPemyZJuMxgTcn6mCnjWvB9HL6ohhhcEmh3EP7_KdJE2QLb4q0E59BIGR08iwnqBG2HVTLTJy5ulpmM6K4GeJVeQtCVEJbz5YfwVpIvqaUUUc5gfiMmSaKueoWYC2WTh6O9506A/s400/angular-right.gif) no-repeat bottom right;
font: bold italic 1em  Georgia, verdana, Helvetica,  "Times New Roman", Times, serif;
color : #000;
border: 1px solid #DDD;
}
.post blockquote p {
margin: 0;
padding-top:10px;
}

Blockquotes With Inverted Commas

 commas-navy-blue Blockquote Code:
.post blockquote {
  font: 18px normal Tahoma, sans-serif;
  padding-top: 10px;
  margin: 5px;
  background: url(https://blogger.googleusercontent.com/img/b/R29vZ2xl/AVvXsEj6TlC33ozMcVh6O9ZQiiuFthUXeDuo6SPEiCPPPevys-fEJOlCgvD5RC7R3BA8N5XMdqC0Z8u8Uu2sWzGpheTJBEPtpiLM7VlOmZViB0oitF9kD8UoOjpdLmKY1gwnzfBTZXXdf4y9bdE/s400/comma-left.gif) no-repeat top left;
  text-indent: 65px;
  }
  .post blockquote div {
    display: block;
    background: url(https://blogger.googleusercontent.com/img/b/R29vZ2xl/AVvXsEjbvtK_leVmtZFlp_vsCs1Tja1Ant_VHan-o3Bdl2xrbxbhjLJePMCjaRRDLILypXDJ3n81_4G86vnbDJzdO1twjQNugNu0sWSbfi_r2bywBMIr2z9nOR5V37YIVsxMS6Xa4xHx8MovIvs/s400/comma-right.gif) no-repeat bottom right;
padding-bottom:10px;
}
.post blockquote p {
margin: 0;
padding-top:10px;
}

commas-orange
  Blockquote Code:
.post blockquote {
  font: 18px normal Tahoma, sans-serif;
  padding-top: 10px;
  margin: 5px;
  background: url(https://blogger.googleusercontent.com/img/b/R29vZ2xl/AVvXsEglynYhZdRZn0xYqetWMGo6es54AKSasB7boB6ZcI3orxoDmDrai_dtfQY2v22gd9l2NODcO9Ys-NR0_YS4UhP_3HcqWLzBA6xEaQNvtIuRxZMNWZ_hk0DJiejWuk73oXXFf3cSe2qkdJo/s400/comma1-left.gif) no-repeat top left;
  text-indent: 65px;
  }
  .post blockquote div {
    display: block;
    background: url(https://blogger.googleusercontent.com/img/b/R29vZ2xl/AVvXsEijlbE_PBxAP9FAA3Jo9bZlnB_08cUWLd_6VkEP5DIDEAribAoxE3_HlMFDkYmXbZMP_aO2tJ63et5RzlPrD0faYvgNlBG7lLzP5D7fiTXhUDhz2b7WDZW8x77zLjDB5MZJkLerEgu7bno/s400/comma1-right.gif) no-repeat bottom right;
padding-bottom:10px;
}
.post blockquote p {
margin: 0;
padding-top:10px;
}
commas-hands
 Blockquote Code:
.post blockquote {
  font:bold italic .9em  "comic sans ms", Tahoma, sans-serif;
  padding-top: 25px;
  margin: 5px;
  background: url(https://blogger.googleusercontent.com/img/b/R29vZ2xl/AVvXsEixELb78GuQhJDQli5TlMQI2gPlp5vVz85mIGSquYFH4UMl98mJJS61JMzX1sq8cjCvNmPQsvhYrt7K-F5Y9yywiZaA-f45z8Q2bgXUFeFJhXIsOT5-CC2aisgqOMabqwaL-ENVrvm1ktI/s400/left.gif) no-repeat top left;
  text-indent: 65px;
color:#6299E4;
  }
  .post blockquote div {
    display: block;
    background: url(https://blogger.googleusercontent.com/img/b/R29vZ2xl/AVvXsEiZ7IeaoVjNVZqKXNUzHCM1CCm_aOPmZ3ZycnmlDBRybnBWOPjdorWeJVoEoKA29ZRShhQW390QYxzifGSZmqSR-IPFOGXjohyphenhyphenxeNnP229ry_Xv0NmJBZwxYBnW6-reY_TT0EZ9MrTSSzo/s400/right.gif) no-repeat bottom right;
padding-bottom:30px;
}
.post blockquote p {
margin: 0;
padding-top:10px;
}
commas-green  Blockquote Code:
.post blockquote {
  font: italic 1em  "comic sans ms", Tahoma, sans-serif;
  padding-top: 10px;
  margin: 5px;
  background: url(https://blogger.googleusercontent.com/img/b/R29vZ2xl/AVvXsEhvQqO1MSjVBQPHMK8MQuvewTjTuPBAume3wbKMBWsAUpSvBxWMLPfmjURWIZM1Yygz94KfiooBjG1jX3S8M4R_AM5dLJWuYAaiNMimPajcPD5hDihh3fbqXdJEr98pt_rPZUcgTjadj2Y/s400/comma2-left.gif) no-repeat top left;
  text-indent: 65px;
  }
  .post blockquote div {
    display: block;
    background: url(https://blogger.googleusercontent.com/img/b/R29vZ2xl/AVvXsEhcFEAQDn_bFMgZ4Cn1_F3pyTtdsWHZFXRU3u4Y-TbtC0jVuf2OAkDoBTOBGYi80BKN4u4gsu0vcIT1FRscwOFJ-dyD23t8j_J48YgvolqyvVmLRmVxu2Kglf1CvVC_vu03TPhpZB5PROI/s400/comma2-right.gif) no-repeat bottom right;
padding-bottom:10px;
}
.post blockquote p {
margin: 0;
padding-top:10px;
}

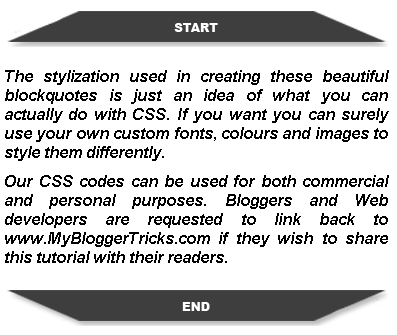
Blockquote With Well Aligned Image At Top


Copyrighted-red
 Blockquote Code:
.post blockquote {
margin : 0 20px;
padding: 70px 20px 20px 20px;
background : #E7E5DC url(https://blogger.googleusercontent.com/img/b/R29vZ2xl/AVvXsEj7Mcpq5r4loI1hyoMqVWjqsruBaMZU3imG98QCjPpUsC9wKrMcr7ZtOED0GS_FCTZztu1N5r8A_QBspahbs-nOmywhEBTOGLZqnDLFNwHHPMvIWPQ5-AaB7FGG_UVdhpHo2HvnHAtzy-0/s1600/block333.gif) no-repeat top;
font: normal 1em "comic sans ms",Helvetica, Courier,"Times New Roman", Times, serif;
color : #000000;
border-bottom : 7px solid #FF0000;
}
.post blockquote p {
margin: 0;
padding-top:10px;
}

Blockquote With Canopy Style Image At Top and Bottom


at-top-and-bottom
 Blockquote Code:
.post blockquote{
margin : 0 20px;
padding: 50px 30px 50px 30px;
background : #FFF url(https://blogger.googleusercontent.com/img/b/R29vZ2xl/AVvXsEjNW8_SXYYBzZ-zF22a3L8q6EgYGTL523da009ziB6Hz3Dg_ym4uCej7nLBcse7252ZUM6D8LpNXlIwWt4Lf-yHymAy2-zFnBevJDtQghye9rCWQxmr0J6QynJvf8BOLMDYAfBuvX9Obfw/s1600/BLOCK1-TOP.gif) no-repeat top;
font: bold italic 1em Helvetica, verdana;
color : #000;
}
.post blockquote div{
background : #FFF url(https://blogger.googleusercontent.com/img/b/R29vZ2xl/AVvXsEjbBV5urBALI4RdgLikqJ-slmjPJEv7gvFC14r7dTfZl1pWJVJvbxbumYBHBI6hgXtF_yCpLoxhsAWxgrtUMx8j0A-adUOzsIwQCB2UJNu1c5DXd5JuutLVMPCPl-mZ-qTUEQtOIWnFxpQ/s1600/BLOCK1-BOTTOM.gif) no-repeat bottom;
padding-bottom: 50px;
}
.post blockquote p {
margin: 0;
padding-top:10px;
}

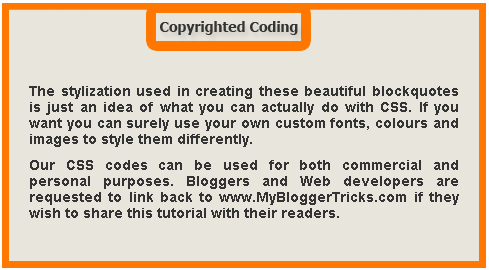
Box Style Blockquote Surrounded By Borders

Copyrighted-orange
 Blockquote Code:
.post blockquote {
margin : 0 20px;
padding: 70px 20px 30px 20px;
background : #E7E5DC url(https://blogger.googleusercontent.com/img/b/R29vZ2xl/AVvXsEjaQyE5rhq8WAz3s_Oz6pueL_kLBwbBtrzZb844nPl74nRPHwG_HX77VT4eXV8zCkDmo4SuQGbPyTMOW5HXXVlU_EYlJeJHM3GnT7oxyjFBz9PbwBy0gl_5aT7ywzBN2J2rzsYCK1NtUQc/s400/block3331.gif) no-repeat top;
font: bold .9em Helvetica, "comic sans ms",Courier,"Times New Roman", Times, serif;
color : #343434;
border-left : 7px solid #FF7802;
border-right : 7px solid #FF7802;
border-bottom : 7px solid #FF7802;
}
.post blockquote p {
margin: 0;
padding-top:10px;
}

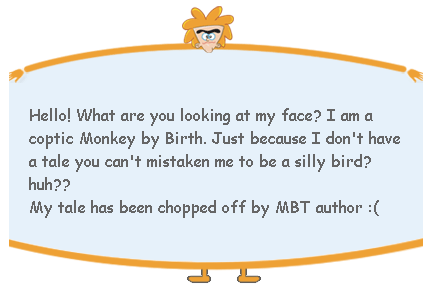
The Monkey Man Blockquote!!!

Once you get an idea on how to use these blockquotes then you can create artistic and some funny blockquotes like the one below,monkey-man
 Blockquote Code:
.post blockquote{
margin : 0 35px;
padding: 80px 0px 0px 0px;
background : #E6F1FA url(https://blogger.googleusercontent.com/img/b/R29vZ2xl/AVvXsEieA6vyxGXUHd64TRNHNDn_VWOiCMvBt3mry1Im_wl0V5gvfdg3S4OxLRdI5SF9s12yYs-kOFGHnw5uq4q7S4E8qRrwdU_cX1eYxYBD9mO9T5VGHdTgXIrKYx1b8SqnYmWV5Njz60WhGsA/s400/head2.gif) no-repeat top;
font: normal 1em "comic sans ms", Helvetica, verdana;
color : #666;
}
.post blockquote div{
background : #E6F1FA url(https://blogger.googleusercontent.com/img/b/R29vZ2xl/AVvXsEjyXPZLZO-8E71p1k2wwbLENNB2_MUWVvwbE_TyK4l3MCWNBOayjwcbf4cASX21UP15KiN80GjmJAjmdM8-iZf3jo86n778vWEWreho3_6NjADjmlnbC-bZ_VNJA8qBP2JWQBaSI7HIbVw/s400/head-bottom3.gif) no-repeat bottom;
padding-bottom: 50px;
}
.post blockquote p {
margin: 0;
padding: 20px;
}

Implementation and Customization:-

Implementaion:-
Now To add One of these amazing and unique blockquotes to your blogs, do the following,
  1. Go to Blogger > Layout > Edit HTML
  2. Backup your template
  3. Search for .post blockquote and delete it along with all its occurrences. In most templates the codes look like this,
    .post-body blockquote { line-height:1.3em; }
    OR
    .post blockquote{ bla bla bla}
    If you couldn’t find such code then it is OK.
  4. Now search for ]]></b:skin> and just above ]]></b:skin> , paste the code for one of your favourite blockquotes. I am giving a sample code below
.post blockquote {
margin : 0 20px;
padding: 60px 30px 40px 20px;
background : #F1F8FE url(Paste Image Link here) no-repeat 350px 5px;
font: normal .9em "comic sans ms", Courier,"Times New Roman", Times, serif;
color : #000;
border: 8px dotted #DAB547;
}
.post blockquote p {
margin: 0;
padding-top:10px;
}
Customization:-
Important areas to be customized are bolded. Where,
  • padding: It refers to the distance of the text from blockquote borders. Which goes in this order –> Top Right Bottom Left
  • background :- This includes Blockquote background color and image used in it. The six digit value is the background color and image link is inserted in place of bolded text in this part-> url(Paste Image Link here)
  • font :- It includes font style, size and type respectively. Match the colours with the code above for reference.
  • color :- This refers to text colour. You can use a different font colour using our color chart
  • border :- This refers to border width, style and colour respectively.
  • All other blockquotes can be customized in similar way.
     5.      After customizing finally save your template and preview it to see the interesting new change.
Note:- For Blockquotes with inverted commas, canopy style and the Monkey Man, there is a little more coding required. Read below
Guide:- For above mentioned blockquotes you need to add some extra tags inside blogger editor as explained below,
Now Whenever you have written a Quote inside the compose mode of Blogger Editor simply switch to the HTML mode and add two tags i.e <div> and </div> between the blockquote tags as demonstrated below,
<blockquote><div>Your Quote Will Be Here</div></blockquote>

Play With Each Blockquote Code!

To get more used to the codes above you need to play with some CSS using our HTML Editor.
Inside MBT HTML Editor paste the any of the blockquote codes above between <style> and </style>  and just below </style> paste this code,
<blockquote>Write Anything Here As a Text</blockquote>
For example for the Owl Blockquote paste the codes in this pattern,
<style>
blockquote {
margin : 0 20px;
padding: 60px 30px 40px 20px;
background : #F1F8FE url(file:///c:/Documents%20and%20Settings/mustafa.themobilehub.blogspot/Desktop/blockquote/owl-icon-48.png) no-repeat 350px 5px;
font: normal .9em "comic sans ms", Courier,"Times New Roman", Times, serif;
color : #000;
border-left: 8px dotted #DAB547;

}
blockquote p {
margin: 0;
padding-top:10px;
}

</style>
<blockquote>Write Anything Here As a Text</blockquote>


That’s All!
I have created all images with text “Copyrighted Coding” or “Scanned Copy” etc. If you want to write something else than use my images as reference size to create your own custom images.
I will publish two consecutive posts where I will share a blockquote with auto number list and a blockquote with a blinking bulb! Make sure you subscribe to be updated about latest CSS and HTML tricks related to Blogger.
Do not forget to tell us how useful or unique this post was for you.


6 Easy Ways To Customize Heading Style In Blogger & Wordpress – Customize Heading Tags


Change-heading-style You must have observed the style of headings in my posts, it’s usually surrounded by two sky blue borders and have a text colour in sky blue. Styling the Headings gives an interesting and attractive look to your blog content. Readers find it more easy to locate a certain portion of your topic with the help of properly customized Headings. Further it will increase your search engine ranking because heading tags produces a really good impression on search engine robots. This tutorial is mainly for Blogspot users but some interesting styling can surely be added to Wordpress. Lets Start!
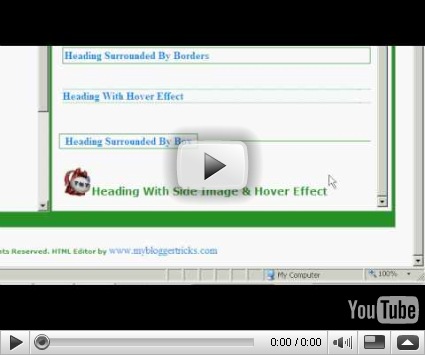


Customizing Heading Style Using Simple CSS – For Blogspot Users


I have six different Heading styles for you guys. Have a look at the video below,


Now to add one of the above Heading Style to your blogs, do the following,


  1. Go To Blogger > Layout > Edit HTML


  2. Search For ]]></b:skin>                  (Tip:- Press Ctrl + F )

  3. Just above ]]></b:skin> paste one of the codes below,


  • For Heading Style with a bottom border, use this code,


.post h3{

color:#0080ff;

border-bottom:1px solid #289728;

font-size: 12pt;

padding:2px;

}


  • For Heading Style with a border at top and bottom, use this code,


.post h3{

color:#0080ff;

border-top:1px solid #289728;

border-bottom:1px solid #289728;

font-size: 12pt;

padding:3px;

}


  • For Heading Style surrounded by borders, use this code,


.post h3{

color:#0080ff;

border:1px solid #289728;

font-size: 12pt;

padding:2px;

}


  • For Heading Style with Hover Effect, use this code,


.post h3{

color:#0080ff;

border-top:1px dotted #289728;

border-bottom:1px dotted #289728;

font-size: 12pt;

}


.post h4:hover{

border-top:1px dotted #0080ff;

border-bottom:1px dotted #0080ff;

background-color: #289728;

color:#fff;

}


  • For Heading Style surrounded by a Box, use this code,


.post h3 {

border-bottom: 1px solid #289728;

color:#0080ff;

font-size:12pt;

}

.post h3 span {

position: relative;

left: -0.3em;

bottom: -0.6em;

padding: 1px 0.5em;

margin: 0;

border: 1px solid #289728;

background-color: #fff;

}


  • For Heading Style with a side Image & Hover Effect, use this code,


.post h3 {

background: #fff url(URL OF Side Image) top left repeat-y;

font-size: 12pt; 

color: #0090ff;

padding:28px 0 0 44px ;

}

.post h3:hover {

color: #289728;

}


Make Sure you replace URL OF Side Image with Image Link of your preferred side image. This image can be 45px by 45px in size or even smaller. I have used the following image in the video above –> tnt


      4.     Now Finally save your template.


Customization and Implementation Of The CSS Code For Headings


Customization:- 

All the CSS codes above use simple properties which are described below,

1.   For Changing border width, style and colour edit codes like this one,

border:1px solid #0080ff

Here 1px refers to border thickness/width and solid refers to border style and the six digit number refers to border colour. You can change border style from solid to dotted or dashed. I like border style to be dotted because it gives a light appearance.

You can use our CSS Colour Chart for getting the six digit number for your desired colour

2.    For Changing Font Size, edit codes like this one,

font-size:12pt 

If you want the text size to increase or decrease than respectively increase or decrease this value 12pt

3.    To Change Font Colour, edit similar codes like this one,

color:#0080ff

You can use our CSS Colour Chart for getting the six digit number for your desired colour

Implementation:-

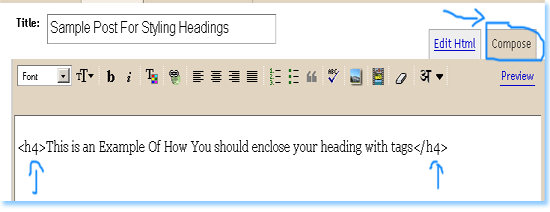
Now Whenever you write a heading in your post inside blogger editor, simply add the following pieces of codes next to your heading,


<h4> Your Heading Goes Here </h4>

See a screen shot below,

Update: In the image below I have mistakenly written


,


tag please convert it to


and


respectively. 


example-image-for-heading-style

This can be done both in compose or HTML mode.

For Heading Style Surrounded By a Box you will need to add slightly different code as shown below,


<h4><span> Your Heading Goes Here </span></h4>

We only need to add an extra span tag (i.e:- <span>) for the box to appear.

That’s All!

Note:- Changes Will Not Appear inside Blogger Editor or on previewing. You will only see a bolded black text inside blogger editor. The styling will take effect only when the post is published.


Customizing Heading Style Using Simple CSS – For Wordpress Users


To be honest I really hate wordpress because it has nothing interesting for new web designers like me. It uses complex php script that few understands and also has a complex CSS editing option that has never went through my throat. If you are an expert wordpress user then you can use the blogspot method above to style headings in your wordpress template but if you find it difficult to edit wordpress style sheet like me then you can adopt a simple way as described below.

We can only apply three out of six Heading style methods to wordpress which are,


  1. Heading Style with a bottom border


  2. Heading Style with a bottom border and top border

  3. Heading Style surrounded by borders

To apply any of the heading style above, do this in your Wordpress Editor,


  1. In the visual mode of your Wordpress editor first write a heading


  2. Now switch to the HTML mode and enclose your heading with the following code,


  • For Heading style with a bottom border, use this code,


<h3><div style="color:#0080ff; border-bottom:1px solid #289728;

font-size: 12pt; padding:2px;">Your Heading Goes Here</div></h3>


  • For Heading style with a bottom border and top, use this code,


<h3><div style="color:#0080ff; border-top:1px solid #289728;

border-bottom:1px solid #289728; font-size: 12pt; padding:3px;">Your Heading Goes Here</div></h3>


  • For Heading style surrounded by borders, use this code,


<h3><div style="color:#0080ff; border:1px solid #289728; font-size: 12pt; padding:2px;">Your Heading Goes Here</div></h3>

The green text is where your heading must lie and the bolded black text is the code that should surround your heading. Now once you have added the codes correctly, simply switch to the visual mode and you will see the heading style in action! See some screen shots below for heading style surrounded by borders,

First enclose your heading with html codes above in the html mode,

Update:
In the image below I have mistakenly written
,

tag
please convert it to


and


respectively.  


wordpress-editor---html-mod


Then press the visual button to see the effect live!

wordpress-editor--visual-mo

To customize the styles read the customization guide for blogspot users

Hope it was clear :

Best Adsense Ad Locations & Ad Formats To Earn Handsome Revenue


Earn-Wisely Almost everyone is well aware that adsense really pays! But most people are still disappointed with their adsense revenue despite working hard in writing good content. I had the same feeling but as time passed I became more and more familiar at how Adsense payment mechanism works. Those who think they are smarter than the Adsense Engineers often end in frustration upon deactivation of their adsense accounts. Kindly prefer fair earning and give preference towards writing good content and attracting more and more readers. The true income lies in the number of visitors to your blog. Clicks, Page Impressions will increase once you make a good start with adsense. By good start I mean choosing smart locations on your layout to encourage Clicks and boost up your daily page Impressions.
Note:-1000 Page Impressions can return $0.5-$1. Depends on type of Ad.

While deciding an Ad Position Always Ask your selves these questions:-

  • What is the user trying to accomplish by visiting my site?
  • What do they do when viewing a particular page?
  • Where is their attention likely to be focused?
  • How can I integrate ads into this area without getting in the users' way?
  • How can I keep the page looking clean, uncluttered and inviting?
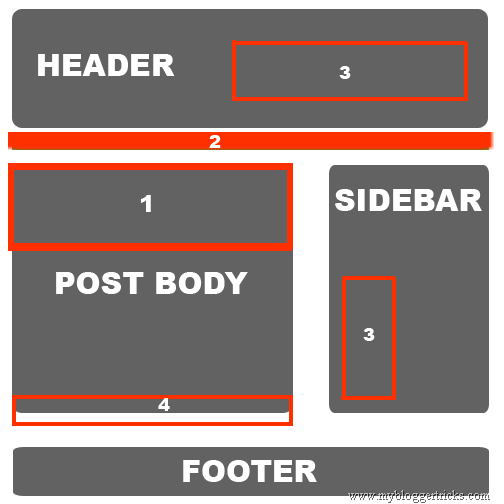
By experimenting with certain Ad positions on our blog and by studying various adsense articles we can now confidently claim the best Ad spots for Blogspot and Wordpress blogs. Observe carefully our Monetized Sample Blog Layout below,
Adsense-Best-Ad-Spots
Every Blog has four main sections i.e
  • The Header:- where we display blog title, description and navigation menu.
  • Post Body:- where we write content
  • Sidebar:- where we display widgets
  • Footer:- where we display credits or widgets
We have numbered the best Ad Locations from #1 (best) to #4 (Least Best). The reasons for each location are explained below.

Location #1:-Displaying Adsense Advertisements Below Post Titles

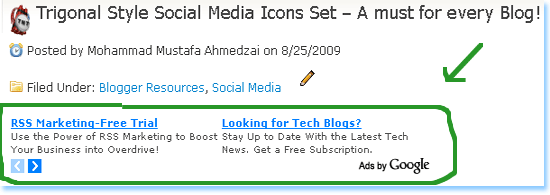
This is the best position to display your ads. We have observed that our blog earning increased tremendously when we decided to display ads below post titles. In fact this is the only spot which is first sight of attraction for every reader.
You can observe that I have displayed no ads below post titles on my homepage but when you enter a specific page the Ad below post title appears. Like this,
ads-below-post-titles
This way we keep our layout clean and revenue green :) I will write a detailed post tomorrow on how to add adsense code below post titles, below post body and under navigation menu.
The Ad formats below will return really impressive results for Ads displayed below post titles.
Best Ad Formats:-
  • Banner (468 x 60) Or
  • Square (250 x 250)  Or
  • Medium Rectangle (300 x 250)

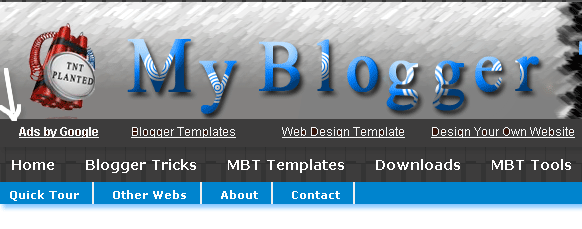
Location #2:- Displaying Advertisements Above Navigation Menu

Now this location is the second best position which is the favourite Ad spot choice for many professional bloggers. The reasons are simple. Firstly because this area is of greatest interest to visitors and secondly because Ads in this area look clean and uncluttered so it won’t annoy the readers at all!
ads-above-navigation-menu
This area will have the highest page Impressions because it appears every where from homepage to archives and individual post pages!
Tutorial on how to add adsense above navigation menu will be shared tomorrow.
Best Ad Formats:-
  • (728x15) Displays up to 5 links   OR
  • (728x15_4) Displays up to 4 links

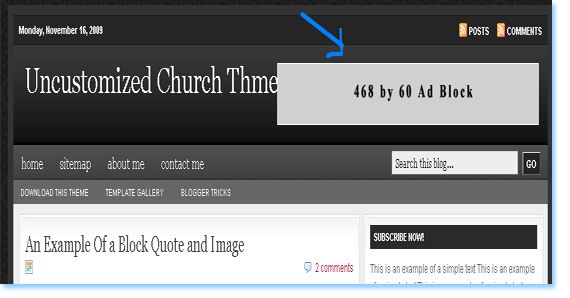
Location #3:- Displaying Advertisements At Right Side Of Header Or On Sidebars

header-right
These two locations have their own importance and according to our experiments we have obtained equal results from both these areas. These two areas give the highest page impressions. Again for the same reason that they appear everywhere, may that be your homepage, archive pages or post pages.
adsense skyscraper
Displaying a skyscraper at the sidebar can result in tremendous clicks. A skyscraper if customized well enough can appear just like a part of your blog links. The ads appearing in skyscraper are very tempting, interesting and attractive at the same time. A well displayed and clean skyscraper  will always attract a visitor to find the right answer to his query.
Best Ad Formats:-
  • For Header Right Choose Banner (468 x 60)
  • For Sidebar choose Skyscraper (120x600) or Wide Skyscraper (160x600)

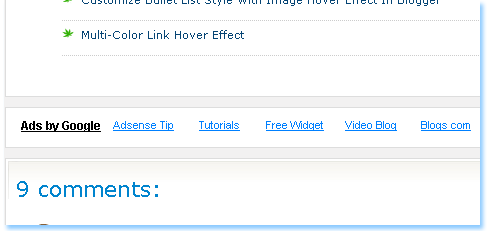
Location #4:- Displaying Advertisements Below Posts

 adsense-below-posts
We gave this area the least importance firstly because the bottom of post is only reached when a reader really enjoys reading your article. Most often readers are in a surfing mood so they would not notice the footer at all. But still we can’t underestimate this area and can expect to get good relevant clicks by displaying the correct ad format as mentioned below.
Best Ad Formats:-
  • Banner (468 x 60) or
  • (468x15) Displays up to 5 links

A word Of Advise

Flow of Income from Adsense Requires patience and immense hard work. Give at least up to 1-2 years for income to flow positively. Give more importance to your blog interface and to your content. A good blog content with unfair user interface is equal to an unsuccessful one. Write quality and unique posts. Buy a custom domain and work harder and harder. Don’t try short cuts by making fraud clicks because one can never beat the extra efficient engineers of adsense. If your adsense account is banned for some reasons, your entire blogging career will end in frustration. Think again!
Patience and hard work brings fruitful results.
I wish you have a nice blogging experience by monetizing your blog wisely and smartly. Take care :>>