Showing posts with label XPERIA. Show all posts

How To Install CWM Custom Recovery In Sony Xperia SP


sony_xperia_sp-860x645

How To Install Custom Recovery In Sony Xperia SP

If You Want To Root Your Device Click Here

1. Before You Begin:

  1. Working for Sony Xperia SP with Unlocked Bootloader
  2. Windows-based computer or laptop
  3. Download Sony Xperia SP USB driver for Windows and install in your computer.
  4. Skip this step if you have installed the Sony Companion.
  5. Enable USB Debugging on your device.
  6. Make sure your phone is charged to 60% 80% to avoid battery blackout and interruption during this tutorial.
  7. We recommend you make a backup on your data and media files before the tutorial.

2. Download Required Files:

  1. Kernel For Sony Xperia SP
  2. Fastboot+ADB(20926)

3. Install Custom Recovery In Sony Xperia SP:

  1. Unlock Bootloader of your device first.
  2. Download & Extract the Fastboot folder from the Fastboot+ADB zip file at your desktop.
  3. Download the Kernel_en.elf and copy it to the Fastboot>Win32 folder.
  4. Rename the copied Kernel_en.elf to Kernel.elf
  5. Turn Off your device completely.
  6. Enter into fastboot mode by connecting your device to PC with USB cable while pressing Volume Up button.
  7. Now open the Folder Fastboot>Win32 and Press & Hold Shift key and press right click of mouse and select open command window here.
  8. A CMD window will appear on the desktop.
  9. Type fastboot flash boot kernel.elf to flash the kernel in your device.
  10. After the process complete turn off your device (Press & Hold Power Button)
CWM Custom Recovery is installed in your device...

How To Install Custom CWM Recovery In Sony Xperia Z (Locked Bootloaders)


xperia-z-white-1240x840-8ff005dc9465d780126a15f59efcc7bc-opt2

Sony Xperia Z operates on the Android 4.1 Jelly Bean platform with Android 4.2.2 update support, and is packed with a host of features and hi-end technology, including a 5''Full HD 1080p Bravia 2 Reality Display, Snapdragon S4 Pro quad-core processor, 13 megapixel fast-capture Cyber-Shot camera and 4G LTE. In addition, the Xperia Z features Sony's Walkman technology for audio playback.
Another unique and interesting feature is being water and dust resistance that Sony Xperia Z offers.
Speaking at the launch of the smartphone, Dennis Van Schie, Corporate Vice President, Head of Sales & Marketing, Sony Mobile Communications, said "2013 will be a breakthrough year for Sony in the mobile sector.  We are delivering on our objective to combine the best of Sony for an outstanding user experience.We have also Rooting method for Sony Xperia Z Click Here after rooting you can also overclock your device from Here

1. Before You Begin:

  1. Sony Xperia Z with Locked Bootloader only,If your device bootloader is unlocked try this method (Don't try in any other device)
  2. Windows-based computer or laptop
  3. Download Sony Xperia Z USB driver for Windows and install in your computer
  4. Connect device to computer with USB cable to complete installation.
  5. Skip this step if you have installed the Sony PC Companion.
  6. Enable USB Debugging on your device.Don't know how enable follow this guide
  7. Make sure your phone is charged to 60% 80% to avoid battery blackout and interruption during this tutorial.
  8. We recommend you make a backup on your data and media files before the tutorial.
2. Download Required Files:
  1. CWM Custom Recovery
3. Installing Custom Recovery On Sony Xperia Z:
  1. Download & Extract Custom Recovery zip file in your desktop.
  2. Make sure USB Debugging is on , follow this guide if you don't know how to enable.
  3. Connect you Device via USB Cable to PC.(Don't launch or Skip PC Companion).
  4. Now open the extracted folder of Custom Recovery and you will find a install.bat file in it.
  5. Launch Install.bat file by douleclick.
  6. A script will open and start flashing recovery in your device.
  7. After successful flashing of reovery, reboot your device....
  8. To enter in recovery mode , press volume up & down when green led is light up during booting.
Congrats!! custom recovery is successfully installed in you device...

How To Install Custom CWM Recovery In Sony Xperia Z (Unlocked Bootloaders)


xperia-z-gallery-03-1240x840-7ecd093f3b661a91374d8ea94bfa2806
We have also Rooting method for Sony Xperia Z Click Here after rooting you can also overclock your device from Here
Now its time to install custom recovery in Sony Xperia Z for getting more from it

1. Before You Begin:

  1. Sony Xperia Z with Unlocked Bootloader only (Don't try in any other device)
  2. Windows-based computer or laptop
  3. Download Sony Xperia Z USB driver for Windows and install in your computer
  4. Connect device to computer with USB cable to complete installation.
  5. Skip this step if you have installed the Sony PC Companion.
  6. Make sure your phone is charged to 60% 80% to avoid battery blackout and interruption during this tutorial.
  7. We recommend you make a backup on your data and media files before the tutorial.
2. Download Required Files:
  1. CWM Custom Recovery
  2. Fastboot+ADB(20926)
3. Installing Custom Recovery On Sony Xperia Z:
  1. Download & Extract Fastboot zip file in C Drive of you PC you will find a Fastboot & Adb folder in it.
  2. Download & Extract Custom Recovery zip file and you will find a boot.img in it.
  3. Copy boot.img file in the Fastboot & Adb  > Win32 folder.
  4. Switch off your device to enter into “fastboot mode” by pressing and holding “Volume Up” button and immediately connect your phone via USB cable to your computer. And wait until the “LED lights up” with “blue color“.
  5. Now open Win32 folder and  Press & hold shift key and press right click of mouse and click on Open Command Window Here.
  6. And then type“fastboot flash boot boot.img"
  7. After the successful flashing, Reboot your device and now you can use CWM Recovery in you device.
So, Here your work done :) Enjoy....:D

How To Overclock Sony Xperia Z


Leaving no stone unturned, the Xperia Z gives you everything you need to make work and play absolutely amazing. To start with, the phone is powered by the powerful 1.5 GHz Qualcomm Snapdragon S4 Pro with 2 GB RAM. To enhance your user-experience on the Sony Xperia Z is the 5 inch TFT capacitive, full HD touchscreen.
Two things you have to love about this screen are the Touch Gesture feature that makes the screen exceptionally responsive making all those slides and scrolls smooth as ever and secondly you have to love the brilliance of theBRAVIA Engine 2 that gives you increased image quality, sharpness, contrast and saturation for an enjoyable viewing experience. To top it off, the Xperia Z employs the Android v4.1 (Jelly Bean) OS to give you all you need from this phone.
To further impress is the 13 MP primary camera with 16x digital zoom and an LED flash. The phone has a 2 MP secondary camera and full HD video recording. With 3D Surround Sound, you enjoy mind-blowing clarity on the music and video players as well as the FM radio.
xperia-z-gallery-03-1240x840-7ecd093f3b661a91374d8ea94bfa2806
But Today we will show you how to make your device more Faster,Smoother by Overclocking you Sony Xperia Z.
1. Before Your Begin:
  1. Your Device must be Rooted and Custom Recovery & Unlocked Bootloader (If your device if not rooted and unlocked & custom recovery please follow this guide).
2. Download Required Files:
  1. DoomKernel (Donate DoomLord for his great work)
3. Overclocking Of Sony Xperia Z:
  1. Plug in your device via USB.
  2. Copy the kernel .zip file to the internal storage of your device.
  3. Unplug the device.
  4. Open XZRecovery (should be installed by the end of out how to root procedure) and click Reboot Recovery.
  5. Once in recovery mode, tap Backup, swipe to backup, and then wait for it to backup.
  6. Hit back.
  7. Tap Install and scroll down to find the kernel .zip file and install it.
  8. Once it’s flashed, hit back.
  9. Hit Reboot > System.
  10. Go to the Play Store.
  11. Search for and install No-frills CPU Control.
  12. Open No-frills CPU Control.
  13. Make sure Set on Boot is OFF.
  14. Tap on the Max Clock Frequency dropdown and select the next highest frequency (do NOT jump to the highest frequency), then hit Apply, and then use the phone for a bit normally.
  15. If there are no issues, then go back to the app and try the next highest frequency, then hit Apply, and then use the phone for a bit normally.
  16. Repeat until you get to the highest frequency the device will allow (if it crashes or reboots then you know to use the frequency just below that one that it didn’t crash on).
  17. Once you’ve settled on a new max frequency, you can check Set on Boot to have it automatically apply the new max frequency every time the phone starts (you wouldn’t want to set this before you know which frequency is good for you because otherwise if it crashed from a frequency it would just constantly crash since that frequency would be set every time the phone turned on).

Root Sony Xperia T


Root Sony Xperia T


Sony Xperia T Video


  • Sony has come up with very good Android phone Sony Xperia T in xperia series
  • It has Dual-core 1.5 GHz Krait.
  • OS is Android OS, v4.0.4 (Ice Cream Sandwich), upgradable to v4.1.2 (Jelly Bean).
  • It comes with A-GPS support and GLONASS.
  • Memory is 1 GB RAM with 16 GB StorEge
  • Primary camera is 13 MP, 4128x3096 pixels, autofocus, LED flash .Front Camera is 1.3.
  • Display is 720 x 1280 pixels, 4.55 inches (~323 ppi pixel density), 16M Colors.It support 4 point mutil touch,Shatter proof and scratch-resistant glass(Sony Mobile BRAVIA Engine) is also available.
  • Other features are 50 GB of Cloud storage (time limited offer),TV-out (via MHL A/V link),Active noise cancellation with dedicated mic,Document viewer, Photo viewer/editor, Voice memo/dial,Predictive text input.
  • Battery is 1850 mAh which is good.
 

Root Sony Xperia SP


Root Sony Xperia SP


Sony Xperia SP Video


  • Sony has come up with very good Android phone Sony Xperia SP in xperia series
  • It has Dual-core 1.7 GHz.
  • OS is Android OS, v4.1.2 (Jelly Bean).
  • It comes with A-GPS support and GLONASS.
  • Memory is 1 GB RAM with 8 GB StorEge
  • Primary camera is 8 MP, 3264 x 2448 pixels, autofocus, LED flash .Front Camera is VGA.
  • Display is 720 x 1280 pixels, 4.6 inches (~319 ppi pixel density), 16M Colors.It support 10 point mutil touch,Shatter proof and scratch-resistant glass(Sony Mobile BRAVIA Engine 2) is also available.
  • Other features are TV-out (via MHL A/V link),Active noise cancellation with dedicated mic,Photo viewer/editor,Voice memo/dial,Predictive text input.
  • Battery is 2370 mAh which is good.
 

How to Install ClockworkMod Recovery on the Sony Xperia ZL


CWM Recovery for the Sony Xperia ZL
Sony Xperia ZL, although being a new device, has been able to get some attention from the developers and as a result, we now have several custom ROMs that are available exclusively for this device. Getting these custom ROMs installed on the device is not a big deal, all you’re gonna need is a custom recovery and you’re good to go. This guide should help you how you can install ClockworkMod Recovery on your Sony Xperia ZL so you can begin flashing ROMs right away!

I. Before You Begin:

1. You must have done our How to Root the Sony Xperia ZL procedure.
2. This works for the 10.1.A.1.350 firmware only.
3. You must have unlocked bootloader of your device. You can do so from here.

II. Downloading Required Files:

III. Installing ClockworkMod Recovery on the Sony Xperia ZL:

1. Download and place both the files onto your Desktop.
2. Extract files from the Fastboot archive to your Desktop.
3. Turn ON the USB debugging option on your device by going to Menu>>Settings>>Developer options>>USB debugging.
4. Once enabled, connect your device to your PC via USB cable.
5. Launch a Command Prompt Window on the Desktop of your PC. To do so, press and hold the Shift button on your keyboard and right-click on any blank area on the screen, then choose Open command window here.
6. Type in following command into the Command Prompt Window:
adb reboot bootloader
7. Your device will reboot into the bootloader mode.
8. Once inside bootloader mode, enter the following command into Command Prompt. Make sure to replace kernel.img with the actual name of the Image you downloaded.
fastboot flash boot kernel.img
9. Once the file’s flashed, reboot your device.
10. And you’re all set!
Awesome! You’ve successfully installed ClockworkMod Recovery on your Xperia ZL and now comes the time to flash some ROMs!

How to Install ClockworkMod Recovery on the Sony Xperia X8


CWM Recovery for the Sony Xperia X8
No matter what version of Android firmware you’re running on your Xperia X8, you can still get the ClockworkMod Recovery on it to flash custom ROMs and Mods. Sadly, the device never got any update after it was updated to Android Eclair, however, with a custom recovery you should be able to bump up your firmware version, almost instantly. Let’s see how you can install ClockworkMod Recovery on your Sony Xperia X8.

I. Before You Begin:

1. You must have rooted your Xperia X8 before doing this procedure. Please head to our How to Root the Sony Xperia X8 procedure first, finish it, then return to this procedure and continue.
2. The following procedure works on Windows based PCs only.

II. Downloading Required Files:

III. Installing ClockworkMod Recovery on the Sony Xperia X8:

1. Download and place the RecoverX archive onto your Desktop.
2. Extract files from the archive to your Desktop.
3. Turn ON the USB debugging option on your device by going to Menu>>Settings>>Applications>>Development>>USB debugging.
4. Once it’s been enabled, connect your device to your PC using the USB cable.
5. Launch the RecoverX tool by double-clicking on its executable file available on your Desktop.
6. From the Brand dropdown menu, select Sony Ericsson.
Xperia X8 RecoverX
Select Brand and Device, hit Next.
7. Select Xperia X8 from the Device dropdown menu.
8. Click Next and it should start downloading and flashing the recovery.
9. Once it’s done, reboot your device for the changes to take effect.
10. You’re done!
Awesome! Your Xperia X8′s now rocking ClockworkMod Recovery and now is the perfect time to give it some ROM love!

How to Install xRecovery on the Sony Ericsson Xperia X8


x8-xperia-xrecovery
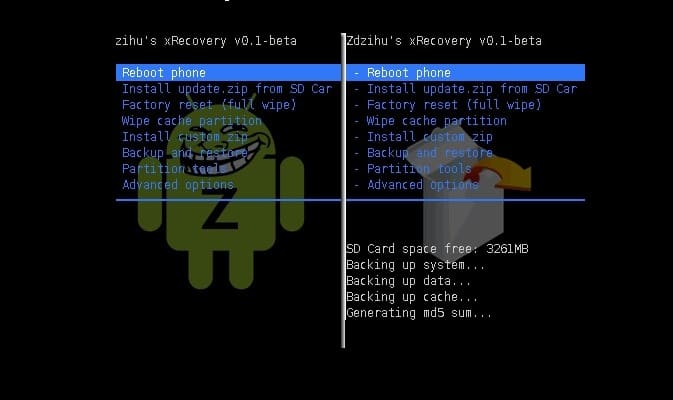
Installing a custom recovery is the next step to take if you have already rooted your phone.  What can you do with a custom recovery you ask?  Only the most important things like backing up your device and flashing a custom ROM.  Read on then to know how to install xRecovery (a custom recovery built for the Xperia family) on the Sony Ericsson Xperia 8.

I.  Before You Begin

1.  Your device must be rooted before you can flash xRecovery on the Xperia X8.  Use our guide to help you with this if you haven’t already done so.
2.  Make sure that you have at least 75% of device’s battery charged before you begin.
3.  Back up everything you feel is important before you start with this procedure.

II.  Necessary Downloads

III.  Installing xRecovery on the Xperia X8

1.  Install BusyBox on your device.  You can do this by heading to the Play Store on your device or by going to the web version here, logging in with your device-associated Google account and clicking on Install.
2.  Extract xRecovery0.1.rar to a folder on your desktop.  You should end up with the following files:
busybox
chargemon
xrecovery.tar
3.  Connect your device and copy the first three files to your device’s SD card.  Disconnect your device from your PC.
4.  Go to the Play Store again and install Root Browser Lite.
5.  Open up Root Browser Lite on your device.
6.  Press and hold on the system folder to bring up options.  Then click on Permissions.
7.  Tick all the checkboxes under Write and click OK.  [Note down the CHMOD status before you change these; this is usually 0775, a number you can see at the bottom of the dialog box.]
8.  Copy the three files you have on your SD card to /system/bin folder.
9.  Hold and press on each file, click on permissions again and tick all boxes under Read, Write and Execute columns. [The CHMOD number at the bottom of the dialog box will be 0777].
10.  Go back to the system folder and change the permissions to as they were previously.
And you’re done!!  You should now have xRecovery installed on Xperia X8.

IV.  Accessing xRecovery

1.  Power down your device.
2.  Keep pressing the Back button as soon as you see the white SE logo.
3.  Use Volume Up and Down to move around the menu, Home button to select and the Back button to go back to previous menu.

How to Install xRecovery on the Sony Ericsson Xperia X10 Mini Pro


x8-xperia-xrecovery
Installing a custom recovery opens up doors to flashing custom ROMs, something that is very useful if a manufacturer takes a long time to release updates and when it stops supporting the device altogether.  The post below will show you how to install a custom recovery (xRecovery) on the Xperia X10 Mini Pro, assuming that you have already rooted your device.

I.  Before You Begin

1.  Your device must be rooted before you can flash xRecovery on the X10 Mini Pro.  Use our guide to help you with this if you haven’t already done so.
2.  Make sure that you have at least 75% of device’s battery charged before you begin.
3.  Back up everything you feel is important before you start with this procedure.
4. This procedure is known to work with devices running v2.1.1.A.0.6 firmware.  Make sure that you are running this version before you proceed.

II.  Necessary Downloads

III.  Installing xRecovery on the Xperia X10 Mini Pro

1.  Install BusyBox on your device.  You can do this by heading to the Play Store on your device or by going to the web version here, logging in with your device-associated Google account and clicking on Install.
2.  Extract xRecovery-minipro-0.1.1-beta.zip to a folder on your desktop.  You should end up with the following files:
busybox
chargemon
xrecovery.tar
readme.txt
3.  Connect your device and copy the first three files to your device’s SD card.  Disconnect your device from your PC.
4.  Go to the Play Store again and install Root Browser Lite.
5.  Open up Root Browser Lite on your device.
6.  Press and hold on the system folder to bring up options.  Then click on Permissions.
7.  Tick all the checkboxes under Write and click OK.  [Note down the CHMOD status before you change these; this is usually 0775, a number you can see at the bottom of the dialog box.]
8.  Copy the three files you have on your SD card to /system/bin folder.
9.  Hold and press on each file, click on permissions again and tick all boxes under Read, Write and Execute columns. [The CHMOD number at the bottom of the dialog box will be 0777].
10.  Go back to the system folder and change the permissions to as they were previously.
And you’re done!!  You should now have xRecovery installed on Xperia X10 Mini Pro.

IV.  Accessing xRecovery

1.  Power down your device.
2.  Keep pressing the Back button as soon as you see the white SE logo.
3.  Use Volume Up and Down to move around the menu, Home button to select and the Back button to go back to previous menu.

How to Install ClockworkMod Recovery on the Sony Ericsson Xperia X10 Mini (E10i)


se-x10-mini_cwm-e10i
Now that you have rooted your Xperia X10 Mini, the next step that will lead you to custom ROMs directly is installing a custom recovery.  Installing a custom recovery will not only enable you to flash custom ROMs but help you back up your previous ROMs/data, etc. among other things.  Ready then?  Here’s how to install ClockworkMod Recovery on the Xperia X10 Mini.

I.  Before You Begin

1.  Back up everything you need before you begin.
2.  You need to be rooted for this procedure to work.  If you are not already rooted, take a look at our procedure on the same.
3.  Make sure that you have at least 75% of your battery charged before you start.
4.  This procedure is designed to work on Windows operating systems (preferably Windows 7).  This will not work on Mac/Linux computers.

II.  Necessary Downloads

III.  Installing ClockworkMod Recovery on the Xperia X10 Mini

1.  Extract CWM-Install E10i – benji.berg@xda.zip to a folder on your desktop.
2.  Go to the files folder in the folder you extracted previously.
3.  Rename the cwm_install folder to cwm_files.
4.  Enable USB Debugging on your device.  To do this, go to Menu > Settings > Applications > Developer options and tick the USB Debugging checkbox.
5.  Connect your device to your Windows PC.  If Windows installs drivers at this point, let it do so before you proceed any further.
6.  From the extracted folder, run CWM_install.bat.
And you’re done!  You should have ClockworkMod Recovery installed on your device.

How to Install a Custom Recovery on the Sony Xperia X10


Custom Recovery for the Sony Xperia X10
Nothing could be as amazing as replacing your current firmware with a custom one that has lucrative themes, wallpapers and all those goodies that help make your device stand out in the crowd. Custom ROMs are available for almost all the Android devices out there but the questions arises how to get them installed. Well, a custom recovery should help you do just that. Such kind of recoveries help users flash custom ROMs within a few taps and even provide the option to revert back to the stock firmware, provided you’ve taken nandroid backup. If you’re looking to install a custom recovery on your Sony Xperia X10, then stop by and take a look at the following guide as it walks through all the steps to install a custom recovery on your device.

I. Before You Begin:

1. You must have rooted your device before doing this procedure. Please head to our How to Root the Sony Xperia X10 procedure first, finish it, then return to this procedure and continue.
2. This works on Windows based PCs only.

II. Downloading Required Files:

1. RecoverX 

III. Installing a Custom Recovery on the Sony Xperia X10:

1. Download and place the RecoverX tool archive onto your Desktop.
2. Unzip files from the archive to your Desktop.
3. Turn ON the USB debugging function on your device by heading to Menu>>Settings>>Applications>>Development>>USB debugging.
4. Once enabled, connect your device to your PC via USB cable.
5. Double-click on the RecoverX executable file you have on your Desktop and it’ll launch.
6. Select Sony Ericsson from the Brand dropdown menu.
7. Select Xperia X10 from the Device dropdown menu as shown below:
RecoverX for Xperia X10
Select Brand and your Device
8. Hit Next button given in the bottom-right corner.
9. Follow the on-screen instructions.
10. And you’re all set!
Awesome! Your device has been successfully equipped with a custom recovery and from now onward, you can enjoy flashing custom ROMs, Tweaks, Mods and so on.